For anyone who enjoys the freedom, fitness, and fun of cycling, there come moments when the unexpected happens: a flat tire miles from home, squeaky or unresponsive brakes, skipping gears that make every ride a challenge, or a chain coated in grime. These minor but inevitable hiccups don’t need to derail your day—or your wallet. With a bit of know-how, a few tools, and a willingness to get your hands dirty, every cyclist can learn to perform basic repairs and maintenance that keep their bike rolling smoothly.
Michael Koffler of Shrub Oak International School outlines the most essential DIY bike maintenance tasks: how to change a flat tire, adjust your brakes and gears, and clean your chain. Mastering these basics can boost your confidence on any road or trail, reduce the need for costly tune-ups, and extend the life of your bike.
Changing a Flat Tire: Don’t Let a Puncture End Your Ride
Flat tires are the most common issue cyclists face, but they’re also one of the easiest to fix once you’ve learned how. Whether it’s a pinch flat, a puncture from road debris, or a slow leak from a worn tube, being able to replace an inner tube is an essential skill.
What You Need:
- Tire levers
- A spare tube (make sure it matches your tire size)
- A portable bike pump or CO₂ inflator
- Optional: patch kit (if you want to repair instead of replace)
Steps to Change a Flat:
- Remove the Wheel: Shift your gears to the smallest chainring and cog to make it easier. If you have rim brakes, release the brake cable to allow room for the tire to slide out. Use a quick-release or loosen axle nuts to remove the wheel.
- Pry Off the Tire: Insert one tire lever under the bead (the edge of the tire) and hook it to a spoke. Use a second lever to slide around the rim and work the tire off.
- Remove the Tube: Pull out the damaged tube, and inspect the tire for embedded debris. Carefully run your fingers inside the tire (checking gently to avoid cutting yourself on glass or thorns).
- Insert the New Tube: Inflate the new tube just enough to give it shape. Insert the valve through the rim hole and tuck the tube evenly inside the tire.
- Re-seat the Tire: Start at the valve and work the bead back onto the rim. Use your hands as much as possible; levers can pinch the tube.
- Inflate and Reinstall: Inflate the tire to the correct pressure (printed on the tire sidewall), reinstall the wheel, and make sure it’s secure.
Once you’ve done this a couple of times, it becomes second nature.
Adjusting Brakes: Keep Your Stops Safe and Smooth
Brakes are your most important safety feature. Whether you’re using rim brakes or disc brakes, regular inspection and adjustment can prevent accidents and give you peace of mind.
For Rim Brakes (V-brakes or Calipers):
- Inspect Pads: Look for wear indicators—if the grooves are gone, it’s time to replace them. Also, check that the pads hit the rim squarely, not the tire.
- Tighten or Loosen the Cable: If the brakes feel loose or slow to respond, use the barrel adjuster (found near the brake lever or caliper) to tighten the cable.
- Center the Brakes: Squeeze the brake lever and observe the pads. If one side pulls more than the other, adjust the centering screw on the brake arms.
- Test Brake Response: After adjustments, spin the wheel and squeeze the brakes to ensure even stopping power and that the wheel doesn’t rub when spinning freely.
For Disc Brakes:
- Check Pads and Rotor: Pads should have at least 1.5mm of material. Look for warping or debris on the rotor.
- Align the Caliper: Loosen the mounting bolts, squeeze the brake lever to center the caliper over the rotor, and then retighten the bolts.
- Adjust Lever Reach: Many modern brake levers have a screw or dial to set how close the lever sits to the handlebar.
Properly adjusted brakes make all the difference in emergency stops and downhill rides.
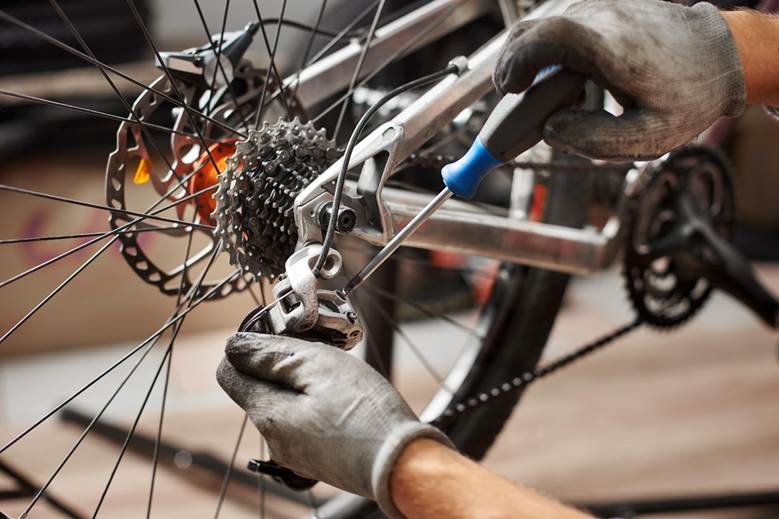
Adjusting Gears: Smooth Shifting for Better Rides
Poorly tuned gears can cause skipping, noisy pedaling, or inefficient riding. Gear issues usually stem from cable tension, derailleur alignment, or a dirty drivetrain.
Rear Derailleur Adjustments:
- Identify the Problem: Is the chain slow to move to larger cogs (upshifting)? You may need more tension. Is it slow moving to smaller cogs (downshifting)? You may need less.
- Use the Barrel Adjuster: Turn the barrel adjuster counterclockwise to increase tension, or clockwise to decrease it. Make small adjustments and test.
- Limit Screws: These prevent the derailleur from shifting the chain off the cassette. “H” screw controls the highest gear (smallest cog), and “L” screw controls the lowest gear (largest cog).
- Fine-Tuning: Shift through all gears to ensure smooth transitions and no noise.
Front Derailleur Adjustments:
Follow similar steps, adjusting the limit screws and cable tension to center the derailleur over the chainrings.
Cleaning Your Chain: Extend Drivetrain Life and Boost Efficiency
A clean chain is a happy chain. Dirt, grit, and old lube cause wear and will eventually rob you of smooth pedaling.
What You Need:
- Degreaser or bike-specific chain cleaner
- A brush or chain-cleaning tool
- Clean rag
- Lubricant (wet lube for rainy conditions, dry lube for dusty roads)
Steps to Clean and Lube a Chain:
- Degrease: Apply cleaner while rotating the pedals backward. Scrub with a brush or use a chain cleaner tool.
- Wipe Off Dirt: Use a rag to remove grime and dry the chain.
- Lubricate: Drip one drop of lube on each link while rotating the pedals. Let it sit for a few minutes.
- Wipe Off Excess: Too much lube attracts dirt—wipe down the chain until it feels smooth but not greasy.
Clean your chain every few weeks or after riding in wet or dusty conditions.
Maintenance is Empowerment
DIY bike maintenance isn’t just about fixing problems—it’s about becoming more connected to your bike and your rides. The more you know, the more you can prevent issues before they happen and make every ride smoother, safer, and more enjoyable.
You don’t need to be a pro mechanic to handle the basics. With a small toolkit and a bit of time, you can confidently tackle the most common issues on your own. If something bigger does come up, you’ll have the language and understanding to talk knowledgeably with your local bike shop.
So go head—get hands-on. Your bike (and your wallet) will thank you.